August 1, 2025
Unfortunately, no. AVC is transitioning from Employee Self-Service Banner 8 (SSB8) to Employee Self-Service Banner 9 (SSB9) because SSB8 will no longer be supported. That means SSB8 will no longer receive regulatory updates, security updates, fixes to defects, etc.
For a secure, safe, up-to-date Employee Self-Service experience AVC has to move to Employee Self-Service Banner 9.
Once Employee Self-Service Banner 9 is live on August 1, it can be reached through the MyAVC Dashboard.
Login into https://my.avc.edu/dashboard
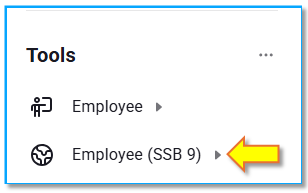
Look for the Tools menu along the left side of MyAVC Dashboard.
Find Employee (SSB 9) and click the triangle to expand the drop-down menu:
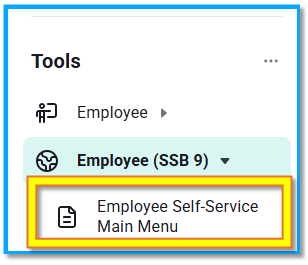
Then click Employee Self-Service Main Menu:
From the Employee Self-Service Dashboard, you can also bookmark it for future access if you prefer using bookmarks.
The Employee Self-Service Dashboard has an area called My Activities.
In the My Activities section is the Enter Time button.
Click Enter Time to open the timesheet page and enter time.
When you are ready to submit your timesheet click Preview in the bottom right corner of the page.
Review your entries and click Submit in the bottom right corner of the page.
Even though the new version of the Employee Self-Service Dashboard has a Request Time Off button, you still need to submit your NOAs through Adobe Sign as usual.
There are multiple ways to obtain help.
- Employee Self-Service Banner 9 training videos are available under the Technical Trainer's Canvas shell. Some of the links are also shared below.
- The ITS Technical Trainer, Greg Krynen, will be holding drop-in Zoom and in-person help sessions - more information will be coming about those.
If the sessions don't work with your availability, you will be able to schedule a 1 on 1 session with Greg (schedule session).
Additionally, you can reach out to Greg by phone or email and he can assist you.
Greg's contact information is: phone - extension 6877 email - greg.krynen@avc.edu
- A training session will also be available during Opening Day for faculty members.
The ITS and PCT teams are available to assist you during this transition. If you encounter issues or have questions, please reach out to help@avc.edu.
Technical Training links:
- What is Self-Service:
https://avc.instructure.com/courses/19/modules/items/2420997
- Employee Self-Service Banner 9:
https://avc.instructure.com/courses/19/modules/items/2478382
- Leave Balances:
https://avc.instructure.com/courses/19/modules/items/2479247
- Pay Information:
https://avc.instructure.com/courses/19/modules/items/2479248
- SSB - My Activities (Timesheet and Leave Request):
https://avc.instructure.com/courses/19/modules/items/2479249
- SSB - Approve Time
https://avc.instructure.com/courses/19/modules/items/2486025
Please reach out to the People, Culture, and Talent (PCT) department at extension 6311.
No, after July 31, 2025, any Employee Self-Service Banner 8 bookmarks you have will no longer work. The new Employee Self-Service Banner 9 pages (like timesheets, leave balances, pay stubs, etc.) have different links.
You will need to update your bookmarks with the new links.
Personal Information lives in two places with the new Self-Service. One of those places is on the Employee Self-Service Dashboard. Near the top left of the page, across from the displayed leave balances, look for your name and the My Profile button below it.
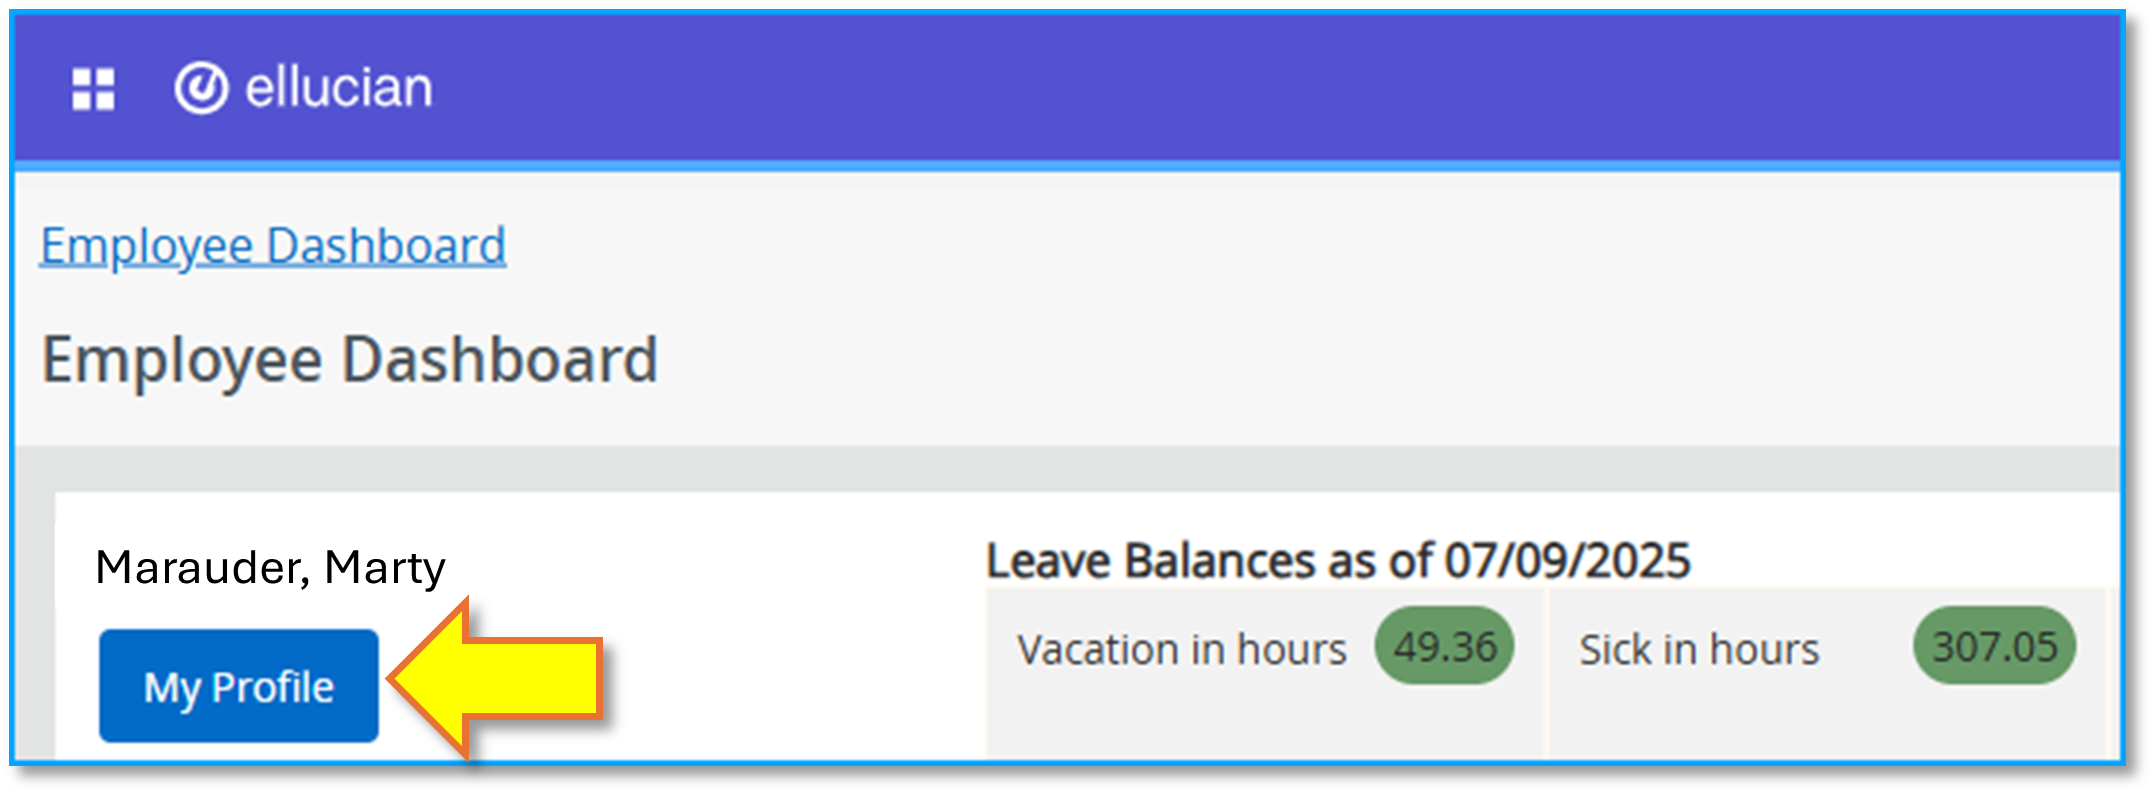
The My Profile button takes you to your profile page with an overview of your personal information, including your 900 number. You cannot edit any information from here.
The other place personal information is viewable is from the General Self-Service module. General Self-Service pages are shared by employees and students, which impacts what shows here and whether it can be changed through the page.
One of the pages included in General Self-Service is the Personal Information page, which has a tile available on the General Self-Service landing page.
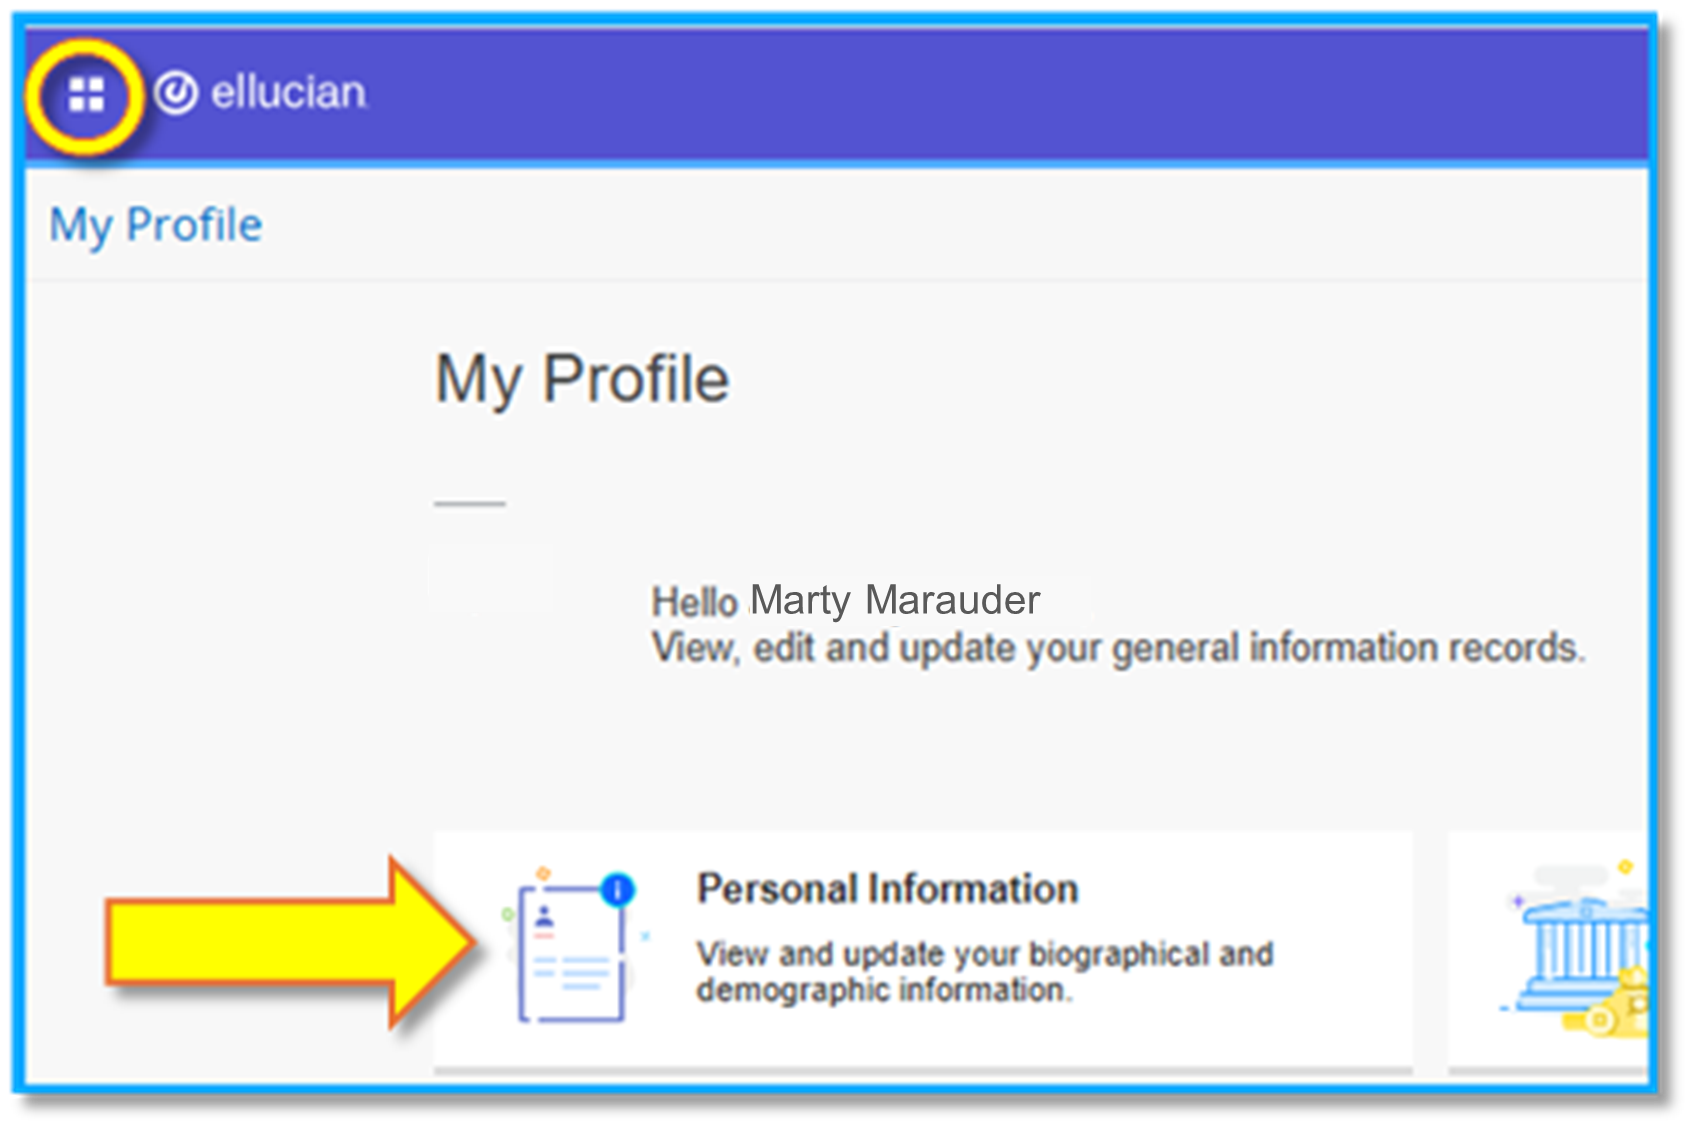
Clicking the Personal Information tile will take you to the Personal Information page which lists much of the same information as the Employee Self-Service Dashboard’s My Profile page does. But from the Personal Information page you can edit some of your personal details.
Employees who need to change or update personal details that aren’t editable through this page should contact People, Talent, and Culture (PCT) for guidance.
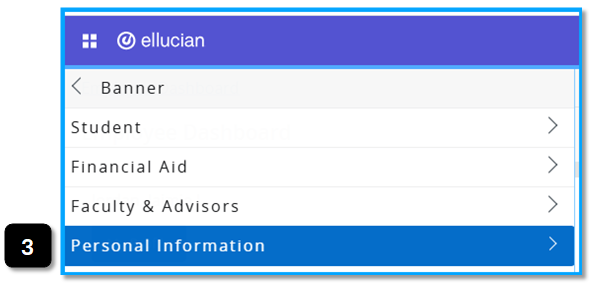
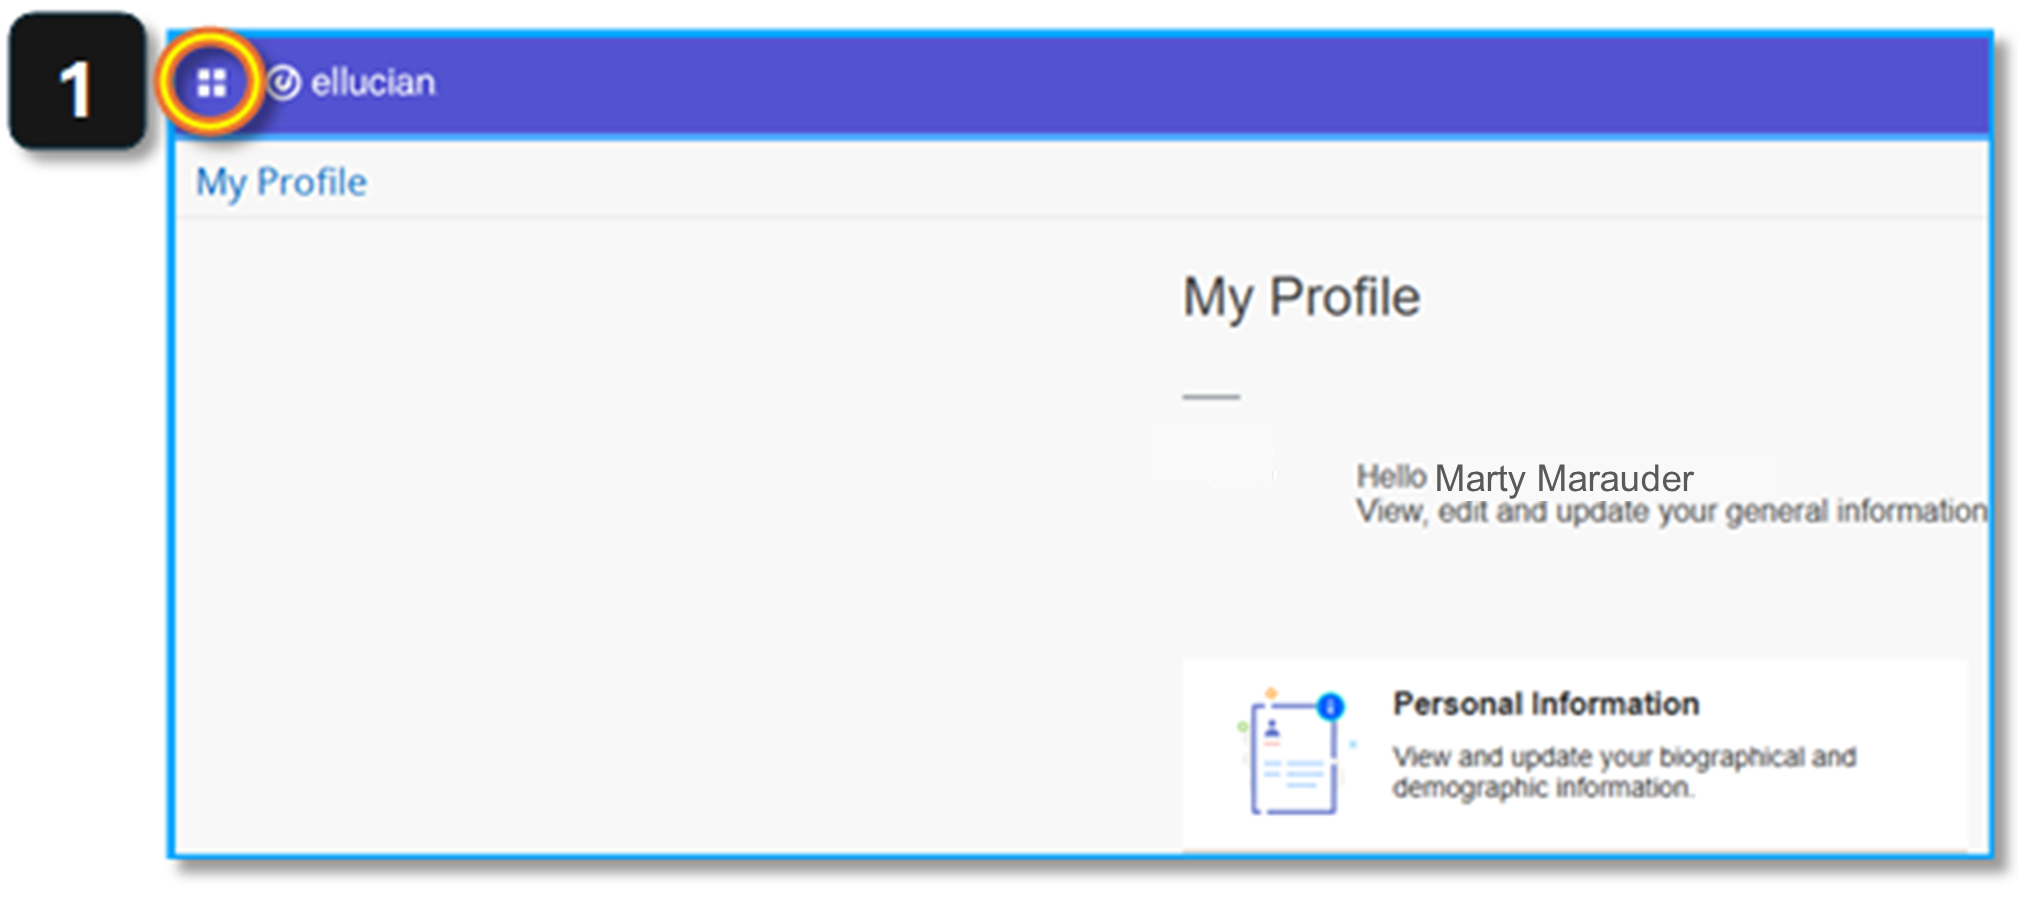
The General Self-Service page can be accessed through the 4 squares in the upper left of the self-service pages:
1. Click the four squares
2. Click anywhere on the row that says Banner
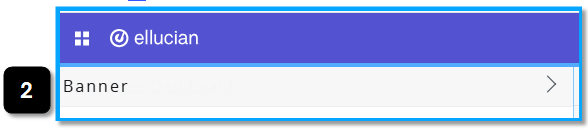
3. Click anywhere on the row that says Personal Information